Know-how
Hardware
This is how you get your new scango.ch self-checkout up and running in about 10 minutes: prepare the devices, connect the checkout terminal and the PayTec payment terminal, and make a test purchase.
Devices at a glance
Device | Description |
|---|---|
Sunmi Flex 3 | Self-checkout with a 22″ screen on a stand, for the counter. |
Sunmi K2 | Self-checkout with a 24″ screen for wall mounting, for higher customer traffic. |
Sunmi K2 mini | Compact self-checkout with a 15.6″ screen for counters and small spaces. |
PayTec UTP1000F | Payment terminal for card and TWINT, approved for unattended self-service. |
A scale (see Scale) and the Stellard device Age for age verification at the entrance are available as options (see Stellard Age age verification). For NFC access there is the Stellard device Entry (beta, see Stellard Entry access control).
Recommended printers for price tags and suitable thermal paper rolls for the receipt printer (not part of the scango.ch service) are listed under Useful accessories.
Preparation
- Check that the checkout terminal and the PayTec payment terminal have arrived undamaged. The appropriate power cables are included in the shipment.
- Place the devices in the desired location.
- The Sunmi K2 is delivered with a metal plate for wall mounting, including printed mounting instructions. Dimensions and notes are below under "Sunmi K2: dimensions and mounting".
- If you have chosen the scango.ch bezel for the PayTec terminal, first slide the PayTec device into the bezel before you start the cabling. We recommend fixing the bezel provisionally at first, for example with double-sided adhesive tape. This allows you to observe the position in daily use with your customers and change it if necessary without permanent drill holes.
- Provide two working Ethernet connections (internet connection) and Ethernet cables long enough to reach the devices.
- Check that your internet connection is activated. Smooth checkout operation requires a stable internet connection with the lowest possible latency.
Sunmi K2: dimensions and mounting
The Sunmi K2 is delivered with a metal plate for wall mounting. You screw the plate to the wall or to a holder and then hang the checkout on the plate.
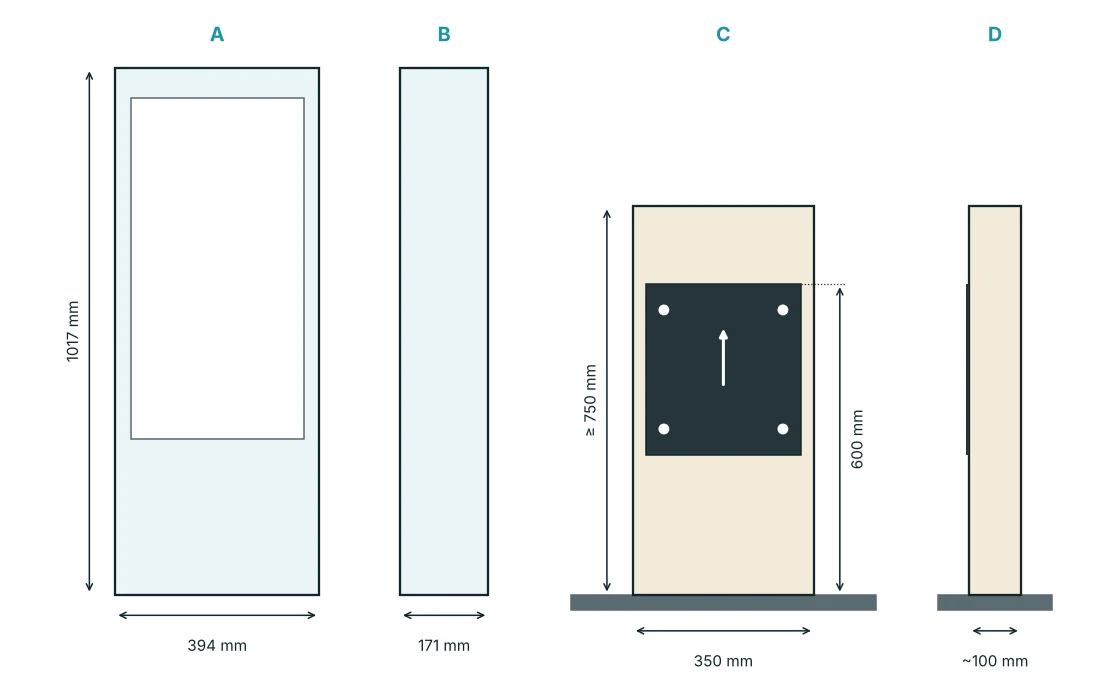
Item | Value |
|---|---|
Device (W × D × H) | 394 × 171 × 1017 mm (A, B) |
Weight | approx. 17 kg |
Metal plate on wall or holder | 4 screws M8 × 50, drill holes Ø 10 mm |
Two rear hangers on the device | 4 screws M6 × 12 |
Important: only drill once the plate has been delivered. Mark the drill holes directly from the delivered metal plate and do not drill in advance based on dimensions from other sources. Check that the wall or holder can safely carry approx. 17 kg and choose wall plugs suitable for the surface.
Mounting on a free-standing counter
If the checkout is not placed against a wall, you need a sturdy holder (e.g. a wooden beam) fixed to the counter, to which you screw the metal plate (C, D):
- Height above the counter top: at least 750 mm
- Width: at least 350 mm
- Top edge of the metal plate: 600 mm above the counter top
- Depth: depends on material and stability, e.g. approx. 100 mm for a wooden beam
1. Put the checkout terminal into operation
Plug the power supply and the Ethernet cable (LAN) into the designated ports of the checkout terminal and switch it on with the power button:
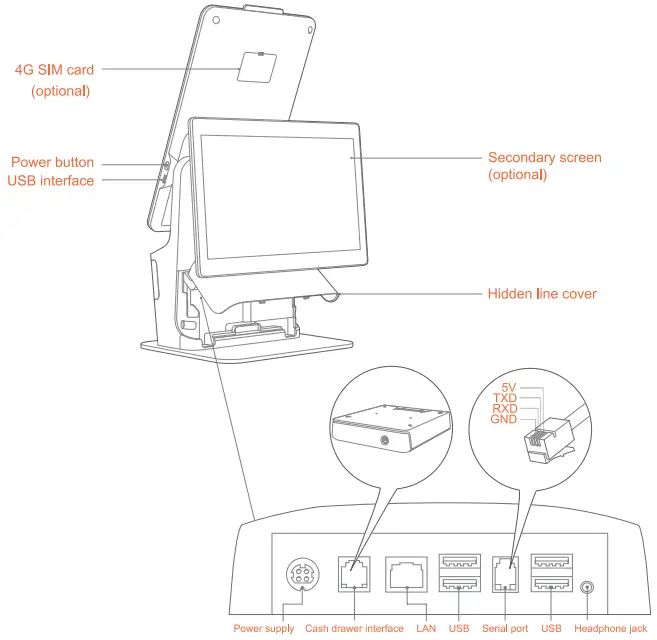
K2 mini: The power button is located on the right edge of the screen, below the middle (next to the USB port).
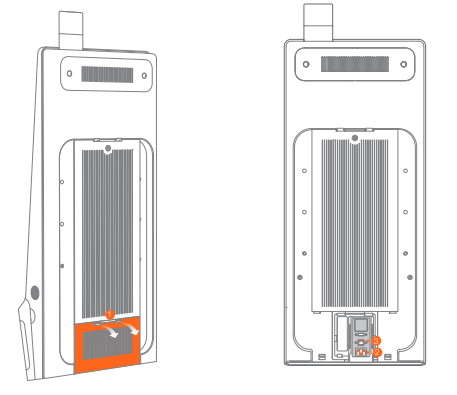
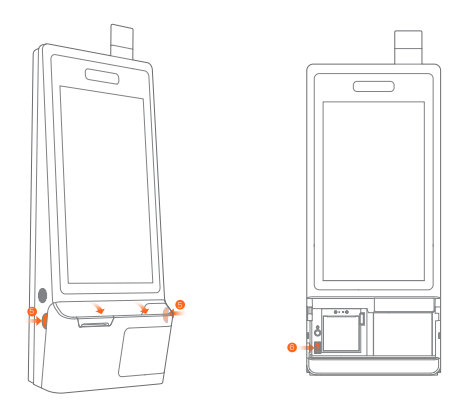
K2: The ports for power (2) and Ethernet cable/LAN (3) are located at the bottom of the back. Then open the lower cover at the front by pressing on both sides (5) and flip the power switch to On (6).
Flex 3: Connect the power and Ethernet cables and switch the device on with the power button.
Tap the "scango.ch Kiosk" app on the checkout terminal's home screen.
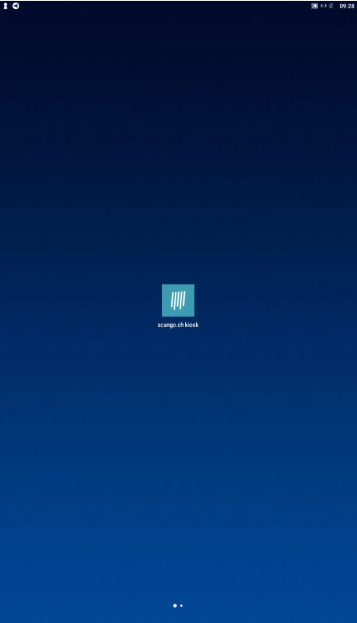
- The checkout terminal automatically switches to sales mode and is ready for operation.
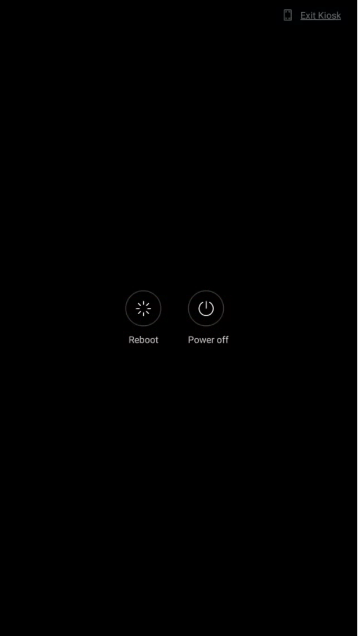
Note: The app runs in kiosk mode. Your customers cannot close it themselves; this prevents operating errors and misuse. To exit the app during operation and reach the Android interface:
- Press and hold the power button.
- Tap "Exit Kiosk".
- Enter the code you received during onboarding.
2. Put the PayTec payment terminal into operation
Plug the power (MBD plug) and the Ethernet cable (RJ45) into the designated ports of the payment terminal.
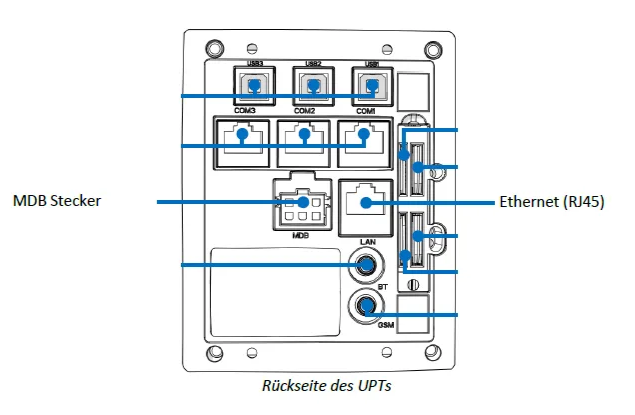
- The device starts automatically as soon as it has power and configures itself as soon as the internet connection is available.
We pair the payment terminal with the checkout for you before shipping. If you need to pair them again later, e.g. after replacing the terminal, follow the guide Connect the PayTec terminal to the checkout.
3. Make a test purchase
- Scan a product of your choice.
- On the checkout terminal, tap the "Pay CHF … with card / TWINT" button. The screen changes and the payment terminal is activated ("Please pay for your purchase at the card reader."). Depending on the store settings, "pay by cash" or a QR code for payment with zahls.ch are also available.
- Pay at the payment terminal with the payment method of your choice.
- The purchase is completed on the checkout terminal: "Thank you for your purchase!" appears.
- Under "Would you like a receipt?", the checkout shows a QR code. Scan it with your smartphone to receive the receipt digitally. If receipt printing is enabled for the device (Settings › Organization › Devices, Enable receipt printing), "Print receipt" also appears. Suitable thermal paper rolls are listed under Useful accessories.
Age-restricted products: If a product with the setting Product is age restricted is in the cart, the pay button shows "Please perform age verification | CHF …". Payment is only possible once your staff have checked the customer's age and scanned the age verification QR code from your fact sheet with the checkout scanner.
Something not working?
- Both devices are connected to power.
- All cables are plugged in correctly (as described above).
- The internet connection is working (modem running, access via another device possible). Note: If your network has a firewall or internet access is otherwise restricted, check that the checkout terminal and the payment terminal are allowed on the network.
- Check the quality of your internet connection. Smooth checkout operation requires at least the following values:
Parameter | Minimum value |
|---|---|
Bandwidth | min. 5 Mbps upload and download |
Latency (ping) | max. 50 ms |
Not sure? Check your values at speedtest.ch.
Still not working?
- Send an email to support@scango.ch.
- Describe as precisely as possible what is not working and send pictures if possible. Only precise error descriptions can be processed efficiently.
- Leave the devices connected to power and the internet so that remote maintenance access is possible.