Cloud Dashboard
Stores and kiosk settings
Stores and kiosk settings
Each store is a location with its own checkouts. Per store you define what is printed on your customers' receipt, which payment methods the self-checkout (kiosk) offers, which languages it runs in and how it looks: colors, background images, sounds and custom texts.
You find the stores under Settings › Organization › Stores. Existing stores can be edited by all roles from Member upwards; new stores are created by Admins and Owners. How many stores your subscription includes depends on the plan: Basis 1, Retail up to 3, Pro up to 10 stores.
Store overview
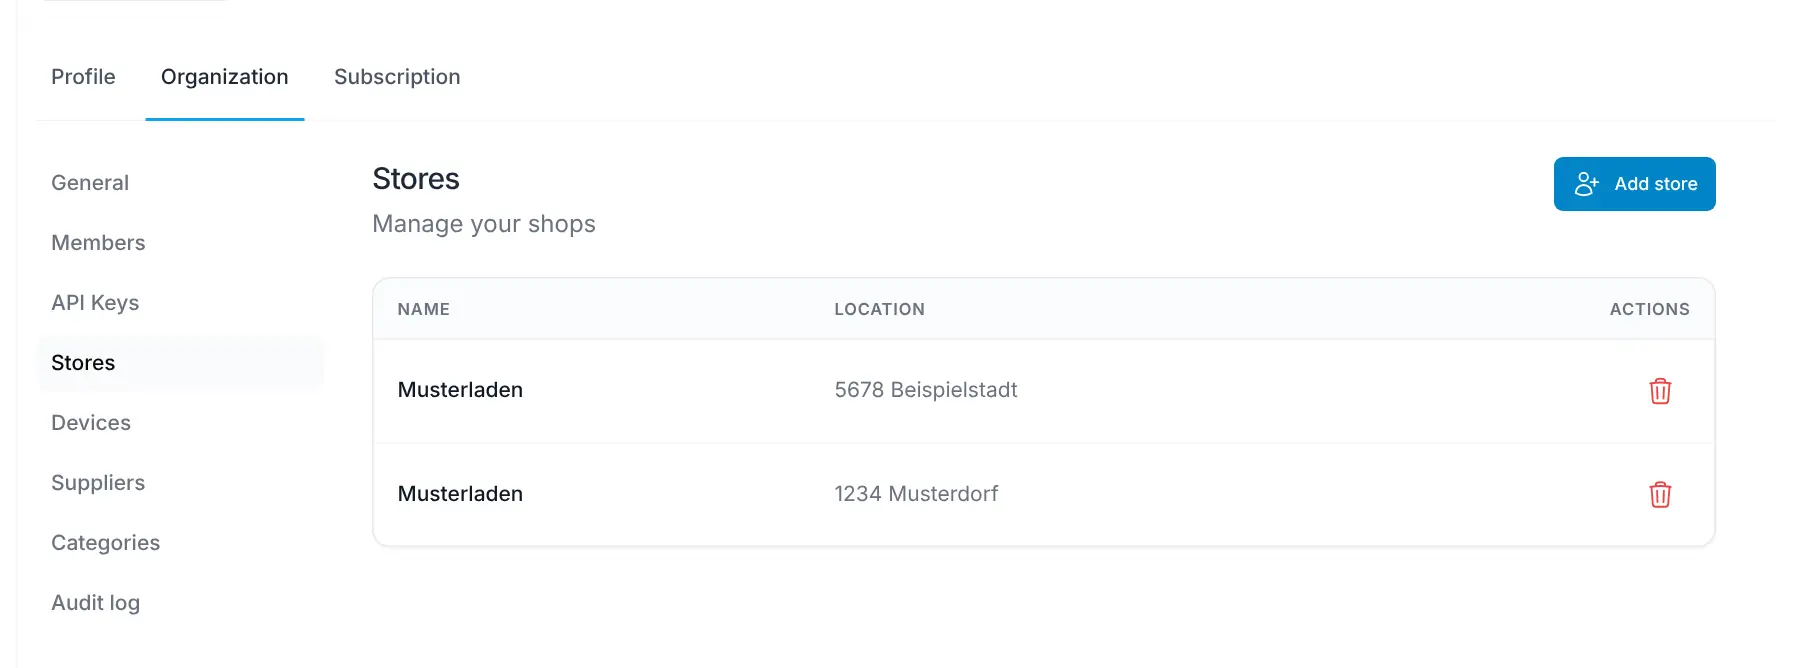
The list shows all stores with Name and Location (postal code and city). Clicking a row opens the store's detail page.
Within an organization, stores often carry the same name, usually the name of your shop. The dashboard therefore tells stores apart by their city, e.g. in filters and selection lists. Enter a distinct city for each store.
To delete a store you no longer use, click the trash icon Delete store and confirm with Yep, delete store.
Adding a store
- Click Add store.
- Enter the store's Name. This name is shown on the receipt.
- Click Create store.
The detail page of the new store then opens, where you complete the remaining details. All fields are saved automatically as soon as you leave a field or flip a switch; a short message confirms the save. To change the name later, click the name at the top (pencil icon).
The detail page is divided into the sections General Information, Payment Options, Kiosk Settings, Language Settings (with the kiosk texts), Appearance and Sounds. At the very bottom, the Change history shows who changed what in the store and when.
General Information
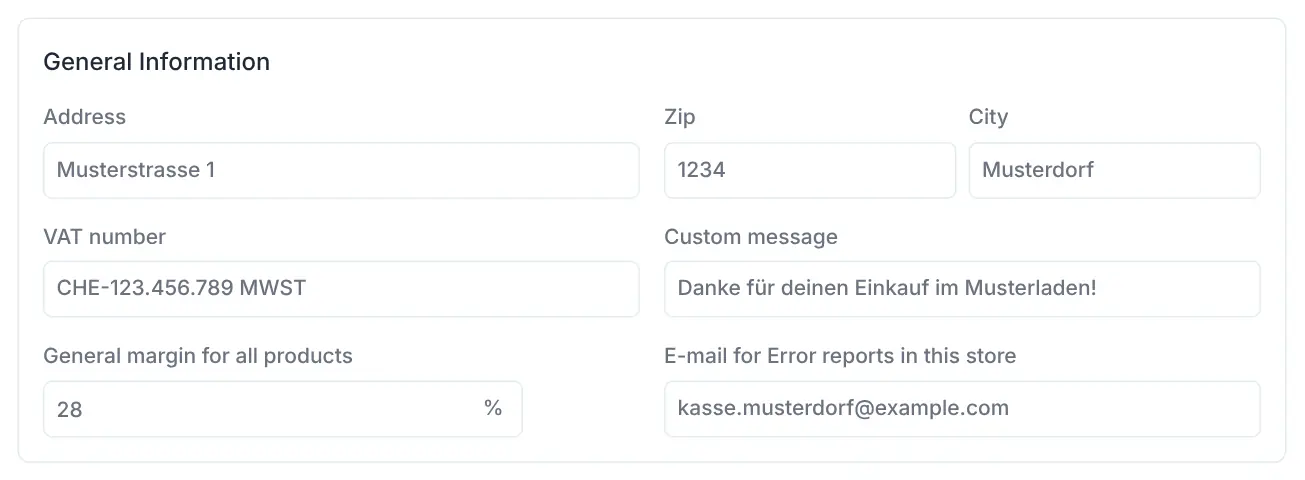
Field | Meaning |
|---|---|
Address, Zip, City | Appear on the receipt below the store name. The city also distinguishes the stores in the dashboard. |
VAT number | Your VAT number. It appears on the receipt together with the name of your organization. |
Custom message | Your own text on the receipt, e.g. "Thank you for your purchase". |
General margin for all products (%) | Fallback for products without a cost price and without their own margin: the kiosk uses it to calculate the cost price of the item sold so that margin analyses are not left empty. |
E-mail for Error reports in this store | The checkout reports problems and special events to this address, e.g. print errors or when a QR code was scanned instead of a barcode. |
The logo on the receipt is your organization's logo (see Settings).
Payment Options
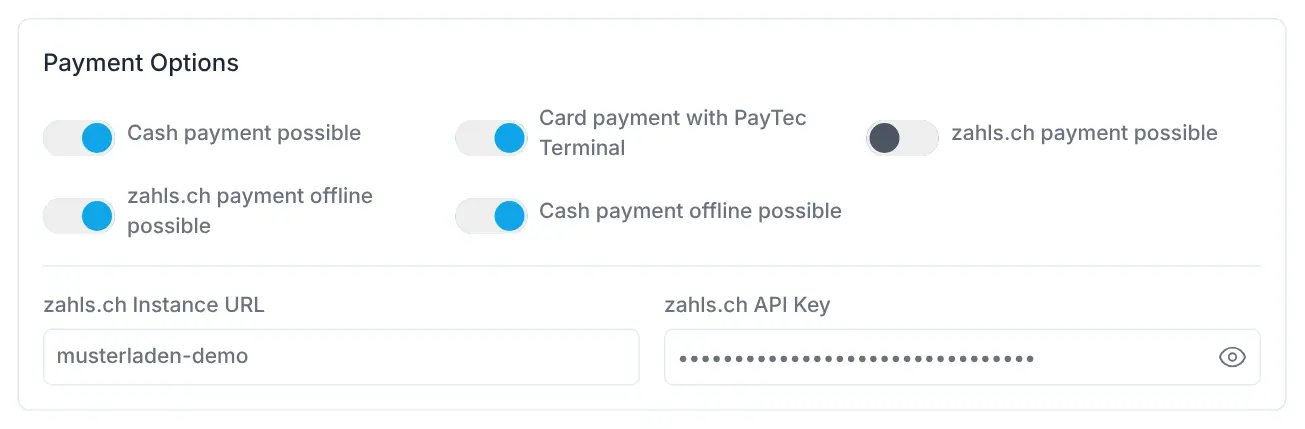
Here you define which payment methods the kiosk of this store offers.
Setting | Effect |
|---|---|
Cash payment possible | A cash payment button appears on the kiosk. Only enable it if your store is set up for cash. |
Card payment with PayTec Terminal | Payment by card or TWINT via the PayTec payment terminal. Normally enabled (see Connect PayTec terminal with cash register). |
zahls.ch payment possible | Payment via zahls.ch. zahls.ch Instance URL and zahls.ch API Key must be filled in. |
zahls.ch payment offline possible | Offers zahls.ch as a fallback when the PayTec terminal cannot be reached. |
Cash payment offline possible | Shows the cash button only when the checkout is offline. |
zahls.ch Instance URL, zahls.ch API Key | Credentials of your zahls.ch account. The API key is hidden; click the eye icon to reveal it. |
If you would like to use zahls.ch or one of the offline options, support will help you set it up: support@scango.ch.
Kiosk Settings
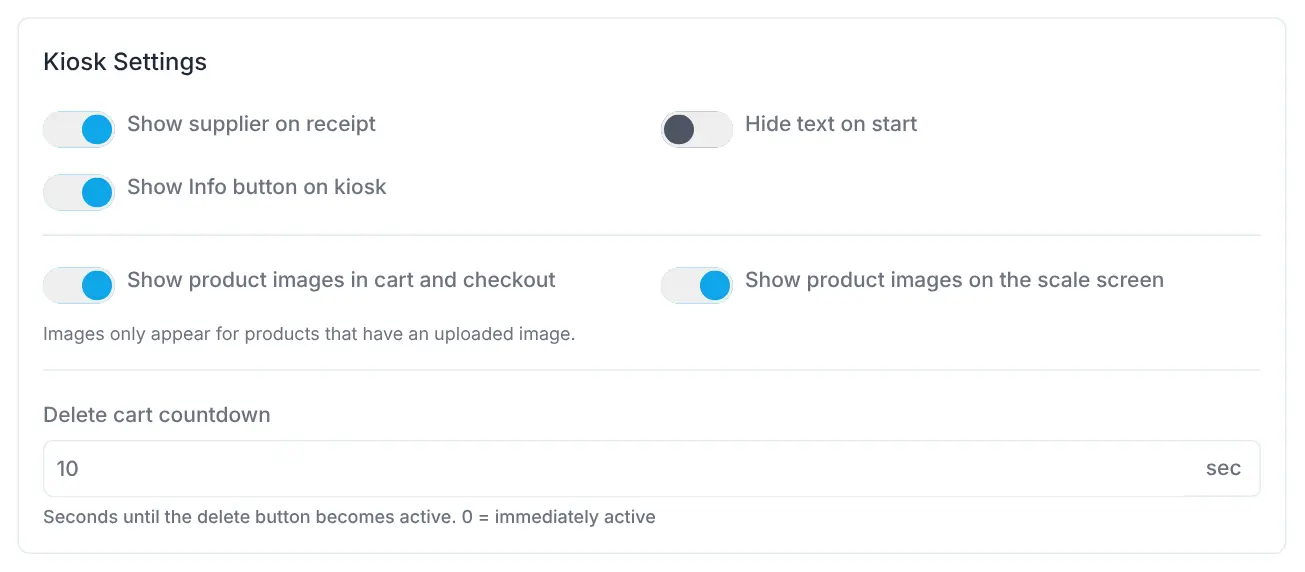
Setting | Effect |
|---|---|
Show supplier on receipt | The supplier of a product, if assigned, is shown on the receipt. |
Hide text on start | Hides the start hints on the welcome screen, e.g. if your background image already contains a hint. |
Show Info button on kiosk | Shows an info button on the kiosk. Enabled by default. |
Show product images in cart and checkout | Shows the product images in the cart and during payment. |
Show product images on the scale screen | Shows the product images on the scale screen. Images only appear for products that have an uploaded image. |
Delete cart countdown (sec) | Seconds until the delete button becomes active when a customer wants to cancel the purchase. Default 10, 0 = immediately active. |
Language Settings
Here you define the language the kiosk starts in and whether customers can choose the language themselves. Available are Deutsch, English, Français and Italiano.
- Under Primary Language, choose the language the kiosk starts in.
- If customers should be able to choose the language themselves, enable Enable multi-language support.
- Under Available Languages, tap the languages that should also be offered. The primary language is always on.
If you remove a language for which you have entered custom kiosk texts, the dashboard asks Delete translations?. If you confirm, these texts are deleted permanently.
Kiosk texts
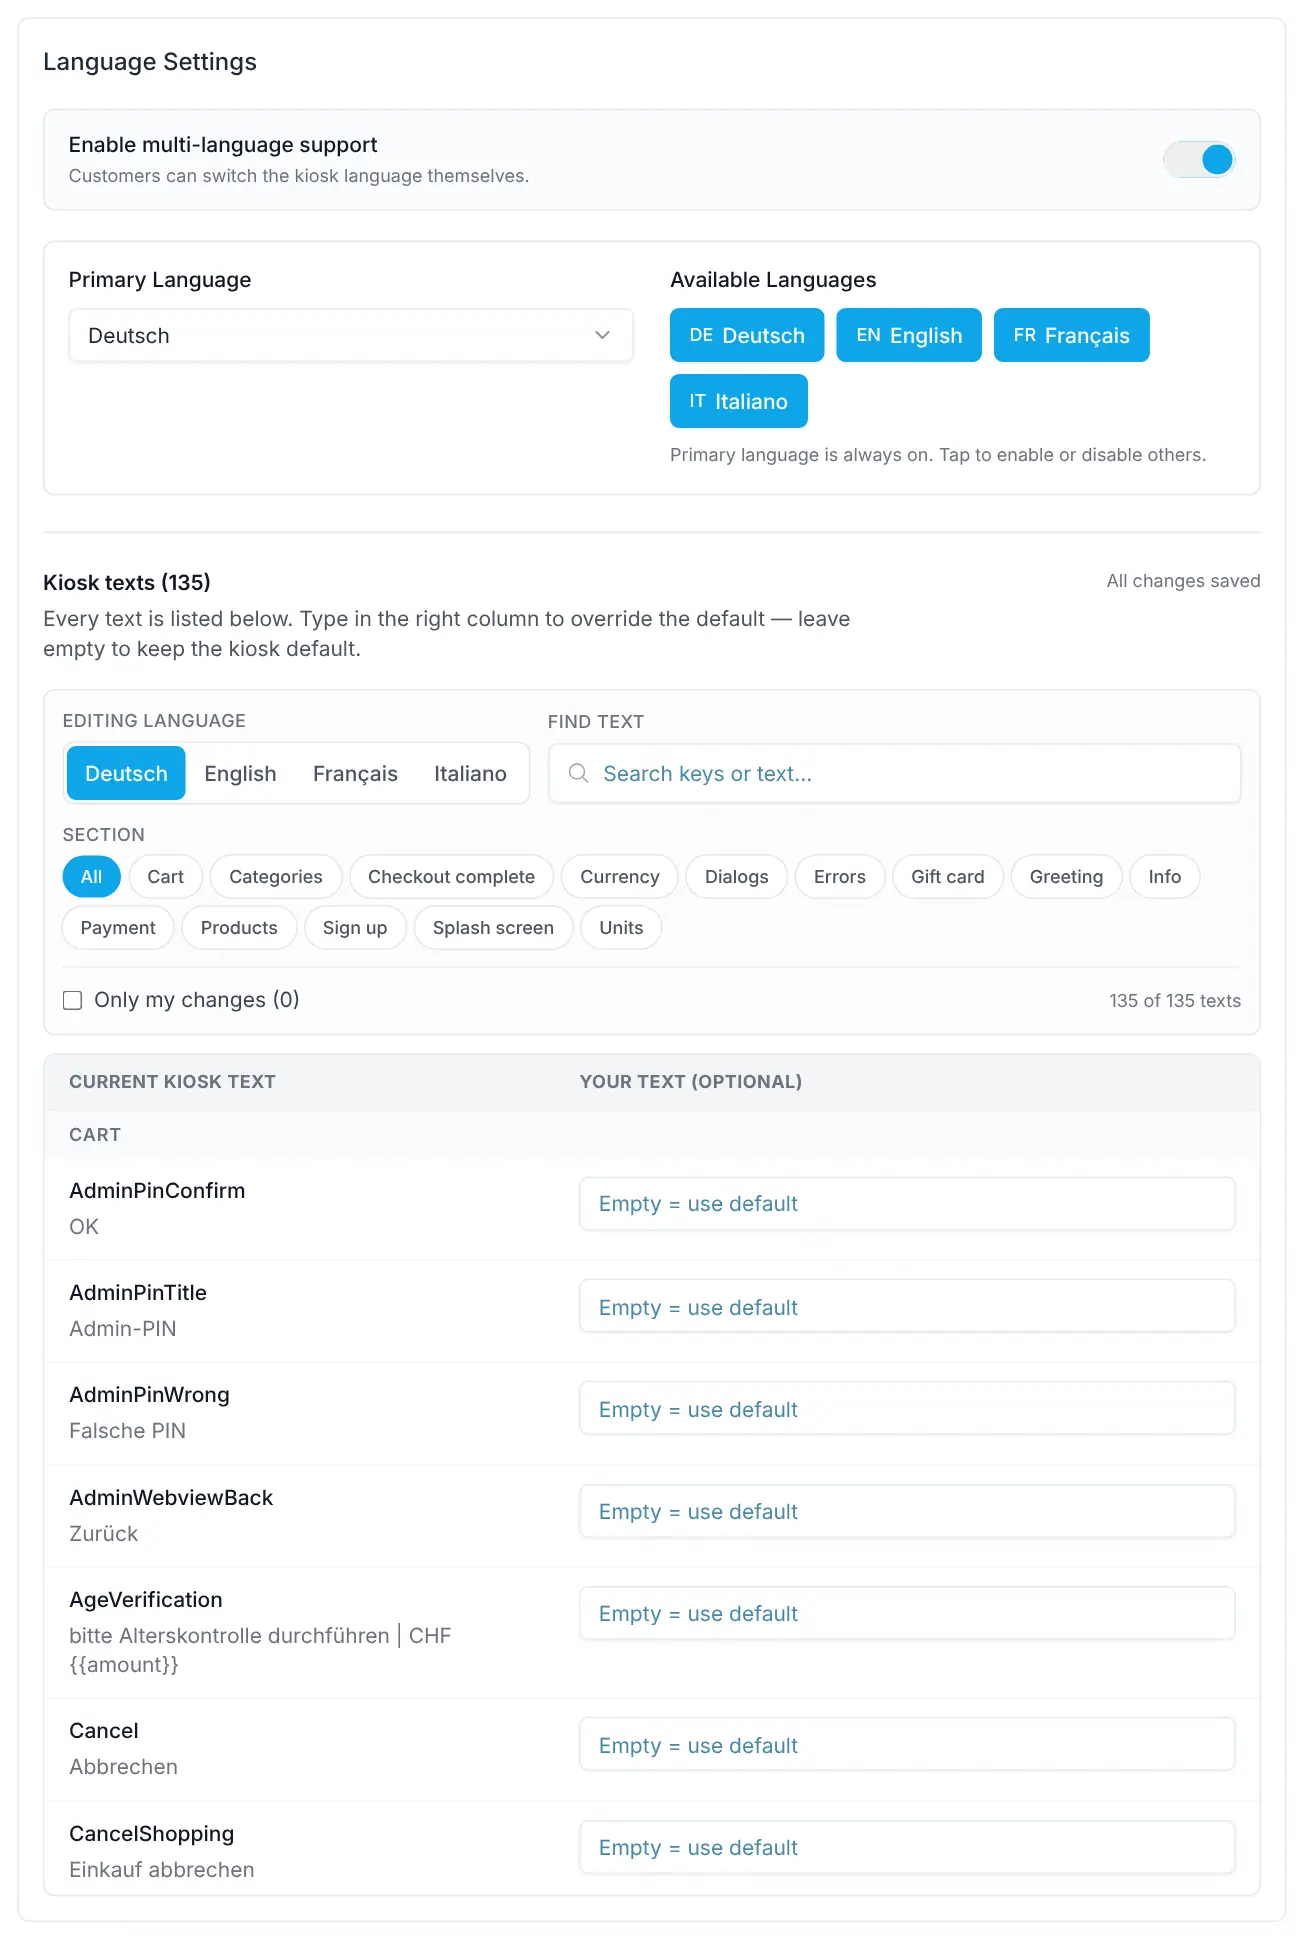
Below the language settings you find the Kiosk texts section (the number in brackets is the number of texts). Use it to replace the kiosk's default texts with your own wording, e.g. the greeting or the checkout complete text.
- If several languages are active, choose the language you want to adapt under Editing language.
- Find the text with Find text or narrow the list with Section: Cart, Checkout complete, Info, Dialogs, Greeting, Sign up, Errors, Payment, Products, Gift card, Categories, Currency, Units or Splash screen.
- The Current kiosk text column shows the default. Type your wording into the Your text (optional) field on the right.
Your texts are saved automatically ("All changes saved"). An empty field means the kiosk uses the default text. Reset restores the default for a text. The Only my changes filter shows only the texts you have changed.
Appearance
Under Appearance you adjust the look of the kiosk:
- Background Color and Font Color: choose the color with the color picker or enter it as a hex code, e.g.
#ffffff. - Backgroundimage on Cart Screen: image shown behind the cart.
- Backgroundimage Welcome Screen: image on the start screen before a purchase begins.
You upload images via the image field and remove them there as well.
Sounds
If you enable Play sound, the kiosk plays a sound with every scan. Under Standard sound to be played when a product is scanned. you upload an MP3 file for this and can listen to it directly in the player.
For individual products you can store a sound of their own (field Sound on product scan on the product page, see Products). It replaces the standard sound for that product. Product sounds are also only played if the switch is enabled in the store.
Tips
- The checkout loads the store settings at startup. If a change does not appear on the kiosk right away, restart the checkout.
- The assignment of checkouts to stores and receipt printing per device can be found under Organization › Devices (see Settings).